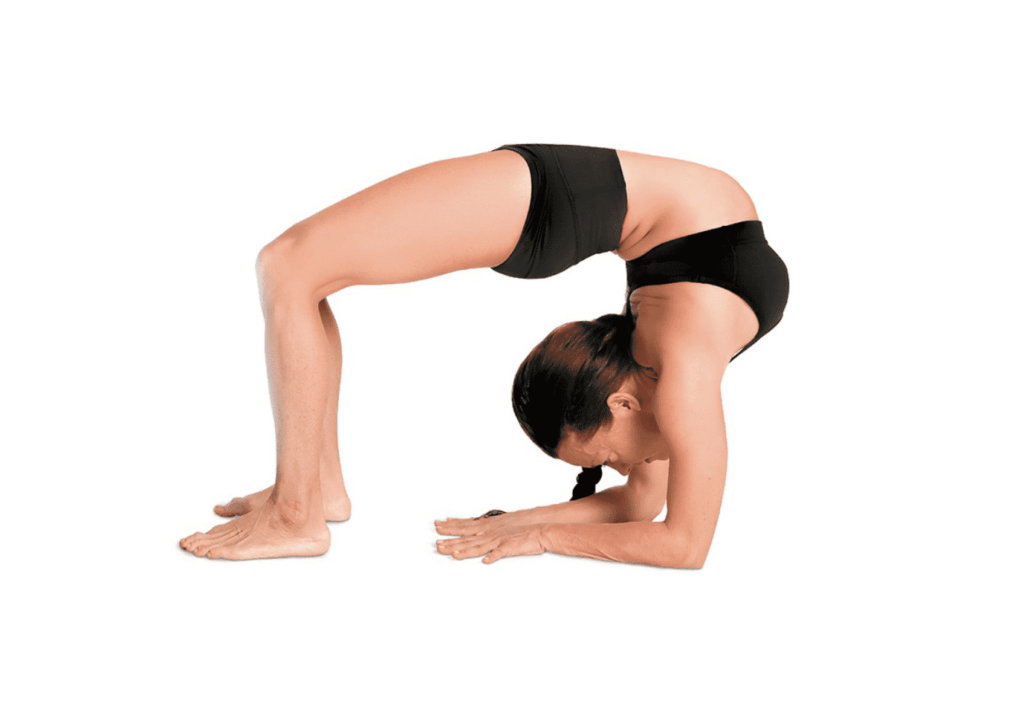
The Forearm Wheel Pose is an advanced backbend wheel pose that opens the chest and shoulders, reinforcing the spine, neck, and thighs backwards. It can give some energy to tired feet and relieve overall fatigue, anxiety, and even headaches.
Information
| Known as: | Urdhva Dhanurasana, Forearm Wheel Pose, Wheel Pose on Forearm, Forearm Upward Bow Pose, Backbend Pose, Chakra Bow Pose |
| Sanskrit name: | ऊर्ध्व धनुरासन |
| Pronunciation: | oor-dvah dah-noo-rah-SAH-nah |
| Type: | Backbend, Inversion, Chest opener |
| Level: | Advanced pose |
| Drishti: | Third eye, between the eyebrows (Bhrumadhye or Ajna Chakra) |
| Focus: | Front of body, Shoulder, arm, spinal muscles |
| Indications: | Concentration, focus, posture, upper arms, shoulders, spinals |
| Chakra: | Anahata Chakra, Vishuddha Chakra, Manipura Chakra |
| Counter poses: | Child’s Pose (Balasana), Cobra Pose (Bhujangasana), Downward Dog (Adho Mukha Svanasana), Bridge Pose (Setu Bandha Sarvangasana), Corpse Pose (Savasana) |
| Preparatory poses: | Downward Dog (Adho Mukha Svanasana), Cobra Pose (Bhujangasana), Bridge Pose (Setu Bandha Sarvangasana), Locust Pose (Salabhasana), Wheel Pose (Chakrasana) |
| Follow-up poses: | Child’s Pose (Balasana), Downward Dog (Adho Mukha Svanasana), Cobra Pose (Bhujangasana), Bridge Pose (Setu Bandha Sarvangasana), Corpse Pose (Savasana) |
| Contraindications: | Wrist, or shoulder, or neck injuries, lower back pain, pregnancy, carpal tunnel syndrome |
Meaning
The Urdhva Dhanurasana is derived from the Sanskrit name, which is made up of three words – Urdhva + Dhanu + Asana:
- “Urdhva” = “upward” or “raised”
- “Dhanu” = “bow”
- “Asana” = “posture” or “pose”
So, the literal translation of the pose is “raised bow posture.”
In yoga, the term “Asana” refers to a physical posture or pose that is practiced to maintain and improve physical health, improve mental focus and calmness, and cultivate spiritual awareness.
Benefits of Forearm Wheel Pose
- The Forearm Wheel Pose is great for the flexibility of the shoulders.
- Recommended for the people with infertility, asthma, back pain and osteoporosis.
- Physically, It helps strengthen your upper arms, spine and leg muscles, and also opens the chest, lungs and hips.
- Mentally, it is energizing your body and also helps bring clarity to the mind, relieves stress, anxiety, depression, and fatigue.
- Energetically, it activates the Anahata, the Heart Chakra so it helps release any stagnant feelings and adds an unconditional flow of love and compassion to the Heart Chakra.
- Stimulates your thyroid and pituitary glands.
- Slows down ageing.
- Calms your nervous system.
- Balances your hormones.
- Improves digestion.
Steps of Forearm Wheel Pose
When you are working towards the Forearm wheel pose, the most important thing to remember is that you are working to create a posture that benefits your body. By building your flexibility and strength over time, you will be able to develop proper alignment, which is important to benefit from this posture. Be gentle and patient with yourself – Forearm wheel pose is a great opportunity to really explore your limits and work through them.
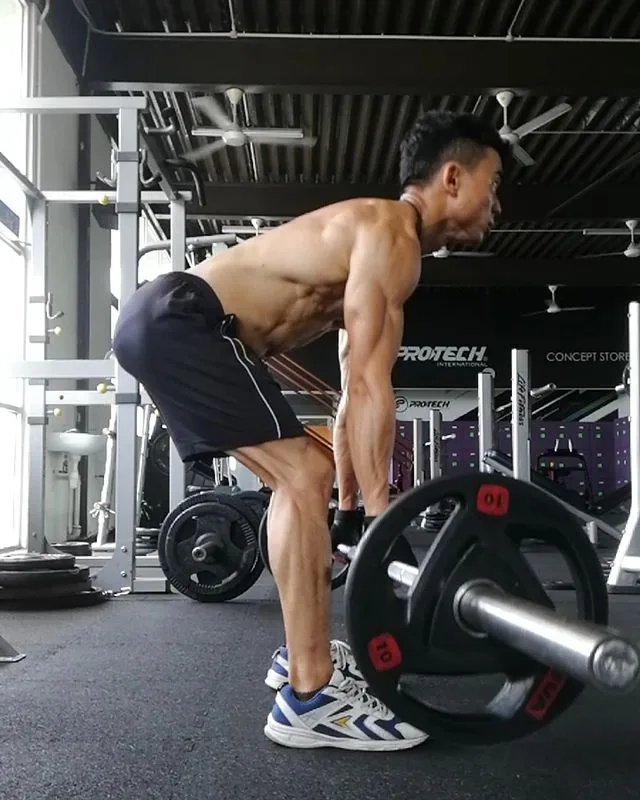
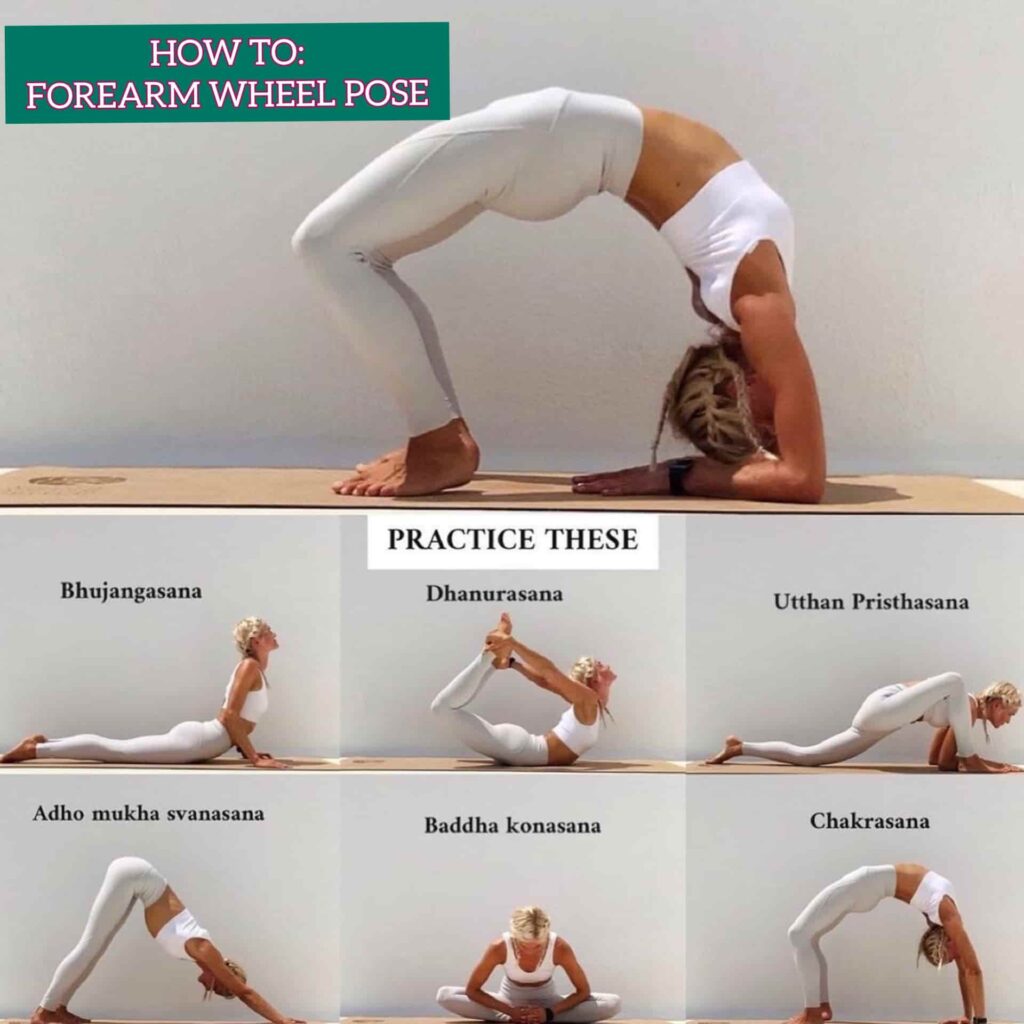
However, It is an advanced backbend wheel pose that requires first a strong practice of other backbends including:
- Bhujangasana
- Dhanurasana
- Utthan Pristhasana
- Adho mukha svanasana
- Baddha konasana
- Chakrasana
Step-1: Do some warm-up
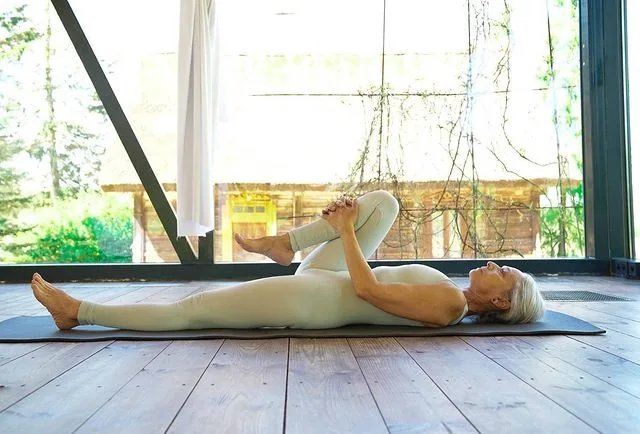
- Warm Up: Do one of the cat-cow in warm up stretches to see how your breath moves, the arches and flexes of your back and how to move the hips and shoulders.
- Surya Namaskar: Perform Surya Namaskar for a few breaths in every 3 Bhujangasana (Cobra).
Step-2: Bhujangasana or Cobra Pose
- To do Bhujangasana or Cobra Pose, lie down on the ground on your stomach, keeping the hands near the shoulders, raise the chest to such a level that the arms become straight, this will be done by spreading the legs.
- Rotate the toes and slowly move the head back.
- Slowly reach the starting position. Repeat this 3–5 times.
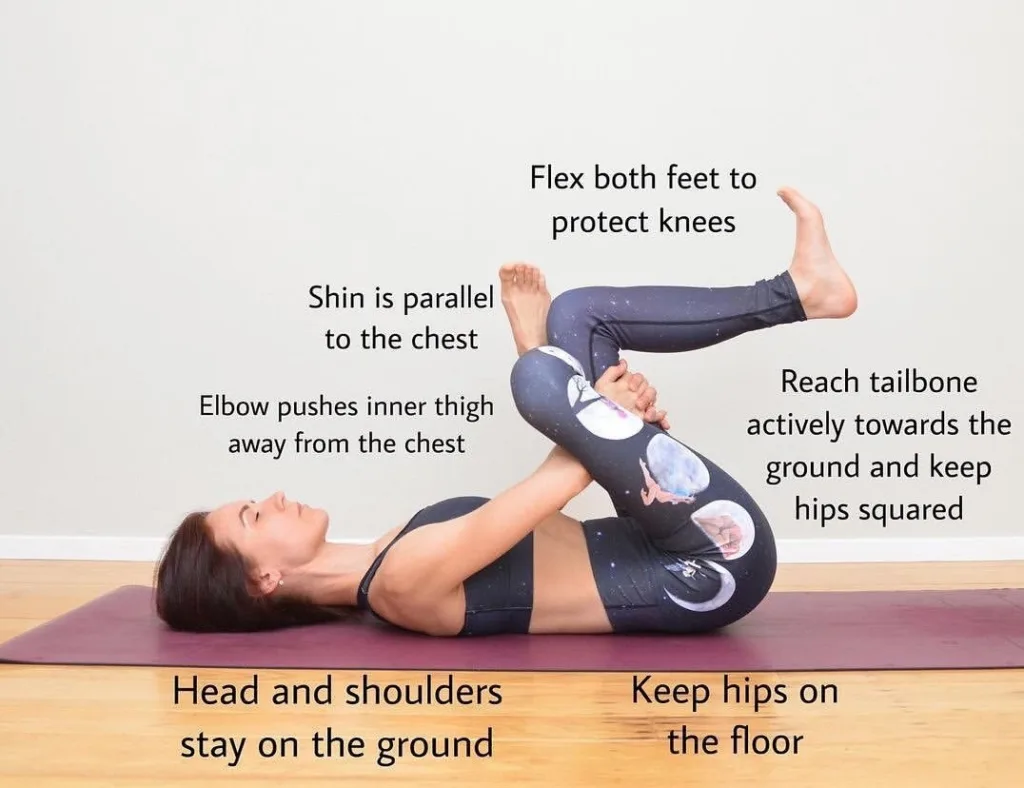
Step-3: Dhanurasana or Bow pose
- Lie on your stomach with your feet hip-width apart and place your hands on the sides of your body.
- Bend your knees, move your hands back and hold your ankles.
- While breathing in, lift your chest from the ground and pull your feet up and back.
- Look straight ahead with a smile on face.
- Do asana while keeping your breath steady. Your body is now curved and taut as a bow pose.
- Take long deep breaths while relaxing in this pose. But bend as far as your body allows you. Do not overdo the stretch.
- After 15 -20 seconds, as you exhale, gently bring your feet and chest to the ground. Release the ankles and relax.
Step-4: Utthan Pristhasana or Lizard Pose
- To get into the lizard posture, we will start with the downward-facing dog.
- Now exhaling, bring your right leg forward and keep both your hands near the right foot and keep it outside your right hand. Make sure that the foot comes all the way to the front of the mat so the toes are in line. In this position, the toes tilt about 45 degrees.
- Bring your elbows to the floor with your forearms and palms outstretched.
- Then slowly bring the left knee to the floor and release the top of the left foot. In this position, press the left heel to keep your left foot active.
- Now to maintain the level of your hips and check with your body.
- If comfortable, keep the head in a neutral position, neither lowering it nor raising it up.
- To get even deeper into the pose, raise the left knee and press into the ball of the left foot.
- Stay in the posture for 5 to 10 seconds and several breaths.
- To come back from this pose in Downward Facing Dog.
- Rest there for several breaths before repeating on the other side.
Step-4: Adho mukha svanasana
- Come to your hands and knees with your wrists below the shoulders and knees below the hips.
- Curl under your toes and push back with your hands to raise your hips and straighten your legs.
- Spread your fingers and apply the index finger downwards into the fingertips.
- Turn your upper arms outward to widen the collarbone.
- Hang your head and move your shoulder blades away from your ears towards your hips.
- Engage your quadriceps firmly to bear the weight of your body weight with your arms. This action goes a long way towards creating a relaxation posture.
- Turn your thighs inward, keep your tail high, and your heel toward the floor.
- Check that the distance between your hands and feet is correct from approaching a plank position. The distance between hands and feet should be the same in these two poses. To get heels on the floor do not place the feet down towards the dog.
- Exhale, release your knees to bend and return to your hands and knees.
Step-5: Baddha konasana or Bound Angle Pose
- Start in dandasana (staff pose), press forward with your big toe, roll your inner thighs down, and go down with your femurs.
- Using the actions of your legs and feet, reach the top of the bones sitting upright instead of falling behind them.
- Take your sacrum towards your navel, and extend your sternum away from your navel to lengthen your frontal body.
- Feel your pubis and tailbone falling evenly toward the floor: The pelvic bowl is straight, neither forward nor back.
- While maintaining this pelvic position, pull your feet towards your groove. Bring the soles of your feet together, and allow your knees to fall towards the sides.
- Notice the effect on your pelvis; Sometimes, stretching your legs back causes the pelvis to stretch back. To move the length of your spine forward and upward, push your pelvis forward, entangling your back muscles.
- Press your shoulder blades against upper back to open chest.
- Hold your ankles to emphasize the lift with your torso.
- Open the soles of your feet as if you were opening the pages of a book.
- Stop anywhere from 10 breaths to 2 minutes, then release.
Step-5: Chakrasana (Full-Wheel Pose/Upward Bow Pose/Urdhva Dhanurasana)
- To begin, lie on your back. Bend your knees so that your feet are approximately one foot from your hips, flat on the floor in a parallel position with your sitting bones. Press your feet firmly on the floor.
- Place your hands on the floor with your fingers in front of shoulders.
- Press into your hands and lift upper body off the mat, resting the crown of your head lightly on mat.
- Press your feet and lift your legs, pelvis, and abdomen above the mat, activating your inner thighs.
- Push more into your feet, bringing more weight to palms. This will protect your lower back.
- Maintain firmness and stability in your arms by pressing firmly into the mat.
- Hang the head in a neutral position, making sure not to strain your neck.
- Hold for 5–10 breaths.
- To get out of the posture, slowly lower your arms and legs and bring your spine back to the vertebrae by the vertebrae.
Step-5: Forearm wheel pose
- Start in wheel pose.
- Bend your elbows and drop to the crown of your head.
- Supporting the weight of your head with one hand, bring your opposite forearm to the floor, followed by your second forearm.
- Bring your palms close enough to interlace your fingers.
1. Engage
- Press down through the entire length of your forearms, and reach your chest through shoulders.
- Press into your feet, and stay strong in your feet.
2. Anatomy Notes
- Focus on pulling your tailbone down and toward your knees to ensure you don’t compress your spine.
- To get out of this backbend, drop the crown of your head to the floor, place both your hands on the floor next to your head, and press back into the wheel.
Precautions and contraindications
Forearm Wheel Pose (Urdhva Dhanurasana) requires strength, flexibility, and balance. It is important to be aware of the following precautions and contraindications to avoid injury:
- Shoulder Injuries: People with shoulder injuries such as rotator cuff tear or frozen shoulder should avoid this pose. The weight-bearing on the arms and shoulders can increase discomfort or cause further injury.
- Lower Back Pain: People with lower back pain or injury should be cautious when performing this pose. The arching of the lower back can put stress on the spine and worsen symptoms.
- Neck Injury: People with neck injuries or pain should avoid this pose. The neck is exposed and vulnerable to strain or injury in this pose.
- Pregnancy: Pregnant women should not perform this pose as the arching of the back can compress the uterus and potentially harm the fetus.
- Carpal Tunnel Syndrome: People with carpal tunnel syndrome should avoid this pose, as it can worsen symptoms by putting pressure on the median nerve in the wrist.
It is important to listen to your body and avoid any poses that cause discomfort or pain. It is always recommended to work with a qualified yoga instructor who can help you modify the pose as needed and provide modifications to suit your individual needs and abilities.


