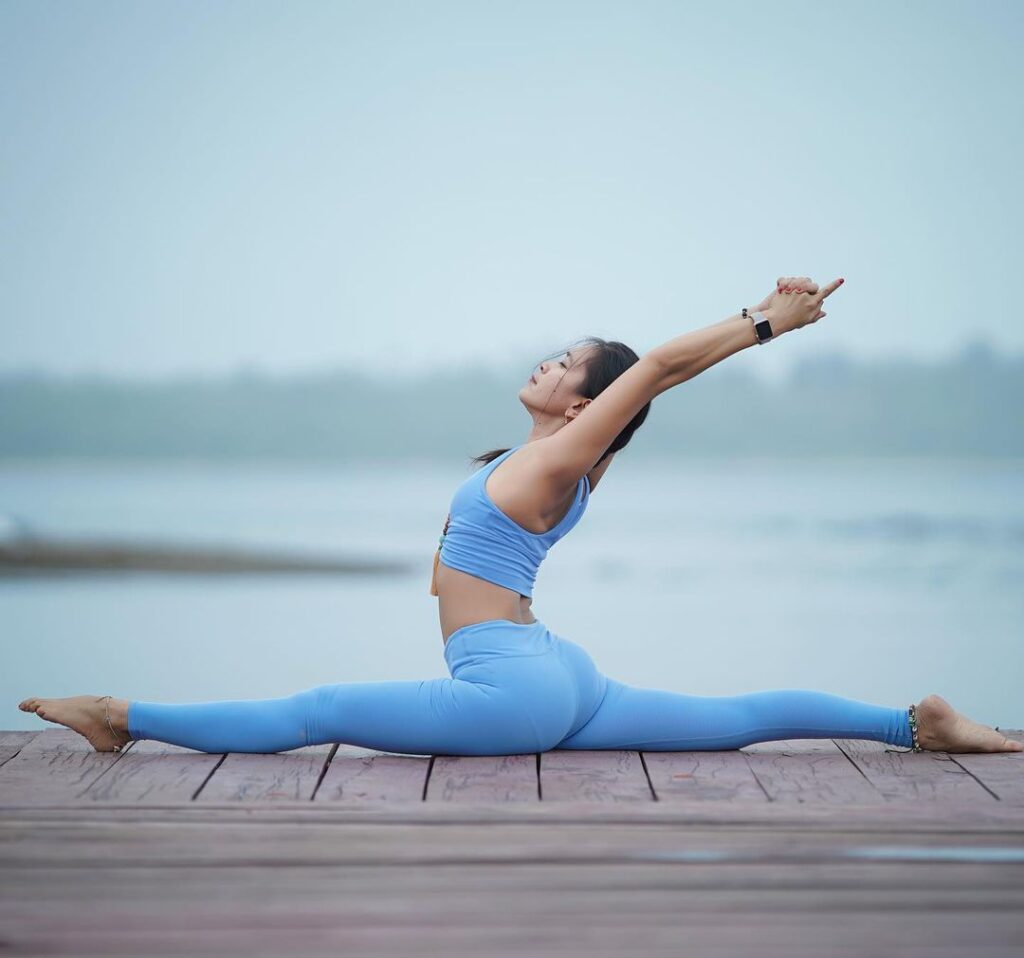
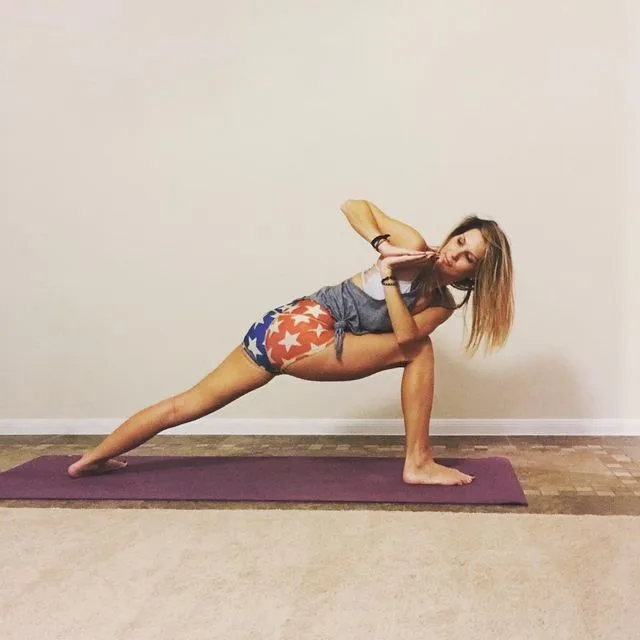
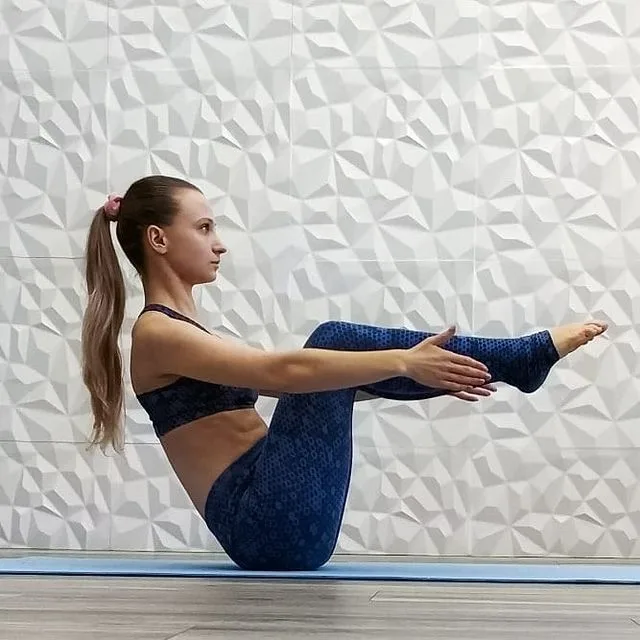
Hanumanasana, also known as Monkey Pose or Split Pose, is a deep hip opener pose works to stretch your waist and legs, as well as open up your chest.
Experts believe that regular practice of this beautiful pose helps in curing sciatica and other doshas of the feet. It tones the leg muscles, keeps the feet in position and is recommended for runners and sprinters. The pose relaxes and strengthens the abductor muscles of the thighs.
Information
| Know as: | Hanumanasana, Monkey Pose, Splits Pose, Dragon Splits Pose, Front Splits Pose |
| Sanskrit name: | हनुमानासन; |
| IAST: | Hanumanāsana |
| Pronunciation: | HAH-new-mahn-AHS-anna |
| Level: | Intermediate |
| Type: | Sitting, hip opener |
| Total time: | 30 to 60 seconds |
| Drishti: | Forward; Upward |
| Chakra: | Swadisthana Chakra, Muladhara Chakra |
| Focus: | Legs, hips, groin, psoas muscles, chest |
| Indications: | Insomnia, increase blood flow to skin, stimulate abdominal organs, varicose veins, sciatica and hernia, digestive, lymphatic, and reproductive systems |
| Counterpose: | Adho Mukha Svanasana (Downward-Facing Dog Pose) |
| Preparatory poses: | Butterfly Pose, Janu Sirsasana, Intense Dorsal Stretch Pose, Wide Stance Forward Bend Pose, Reclined Hero Pose, Reclining Bound Angle Pose, Reclining Hand-to-big-toe Pose, Wide-angle Seated Forward Bend Pose, Urdhva Prasarita Padasana, Intense Forward-bending Pose, Virasana |
| Follow-up poses: | Eka Pada Rajakapotasana, Dancer Pose, Paschimottanasana, Upavistha Konasana |
| Contraindications: | Groin injury, knee or hamstring injury, high blood pressure or low blood pressure (do not raise hands overhead) |
Meaning + Origin
The Hanumanasana is derived from the Sanskrit name, which is made up of two words — Hanuman + asana:
- “Hanuman” = “Lord Hanuman or Monkey”
- “asana” = “pose or posture”
Hanuman was the name of a powerful monkey head of extraordinary strength and skill. The son of Vayu, the god of the Wind, and Anjana, the seventh incarnation of Visnu, he was Ram’s friends and dedicated employees. When Ram, his wife Sita and his brother Laxman were in exile as hermits in the Dandaka forest, Ravana, the demon king of Lanka (Ceylon), came to their rivalry in the foundation of a tap and to seize Sita, and take to Lanka while Ram and Laxman was hunting game. The brothers discovered very far for Sita, and helped Sugriva, the king of monkeys and their general Hanuman.
Hanuman went to the search of Sita, crossed the sea by leaping stratges, found her in Ravana’s palace, and brought the news to the Ram. With the help of a great army of monkeys and bears, Ram made a causeway of stones across the sea to Lanka and killed Ravana and his hosts after a fierce battle and rescued Sita.
During the war, Laxman was struck by an arrow and was unconscious and it was said that the only treatment was a herb juice which was growing in the Himalayas. With a brilliant leap, Hanuman crossed the sea and reached the Himalayas on which the mountain was brought back to the top, on which the life-giving plant grew and thus saved Laxman’s life.
This Asana is dedicated to Hanuman and reminds its magnificent leap. It is followed by going down on the floor with the spreading leg out laterally, while the hands are folded in front of the chest. It looks like the splits of western ballet.
Benefits of Hanumanasana (Monkey Pose or Splits Pose)
Monkey Pose simultaneously stretches your front and back of the legs, which mimics the movements performed in other activities including walking, cycling, running, and skiing. Regular practicing Front Splits Pose will keep the legs and hips supple, which can help prevent injury in other activities.
However the physical and mental benefits of this yoga pose are listed below:
- Physical Benefits:
- Opens the hips and groin and psoas muscles
- Strengthens and tones thighs and hamstrings
- Stimulates abdominal organs
- Stimulates digestive, lymphatic, and reproductive systems
- Improves circulation
- Improves balance
- Prevents and relieves symptoms of sciatica and hernia
- Prevents varicose veins
- Mental Benefits:
- Reduces stress
- Relieves mild depression
- Reduces anxiety
- Calms the mind
Hanumanasana (Monkey Pose or Splits Pose) Practice Guide
In Hanumanasana, the body projects simultaneously in four directions—front and back, up and down.
The posterior hip extends, twists and rotates internally. The front hip flexes, and the knee moves the foot forward.
Like Pigeon Pose, the back creates a “tingling” force in the pelvic ligaments by engaging the hip extensors and front hip flexors, stabilizing it and anchoring it to the floor. The back is extended and the chest opens with the help of the shoulders and arms.
Stretch your hips before you perform Monkey Pose, use a chair to support your upper body and take the normal form of the pose by extending your back hip and flexing your front hip. Contract your hip extensors by squeezing the buttocks of your back leg. Engage your hip flexors by attempting to lift your front leg.
In the beginning, keep your knees slightly bent. Slowly let your body come into the pose. Connecting your muscles that produce this form creates a sensory image of the pose in your brain.
Step-by-step Instructions to Hanumanasana or Monkey Pose
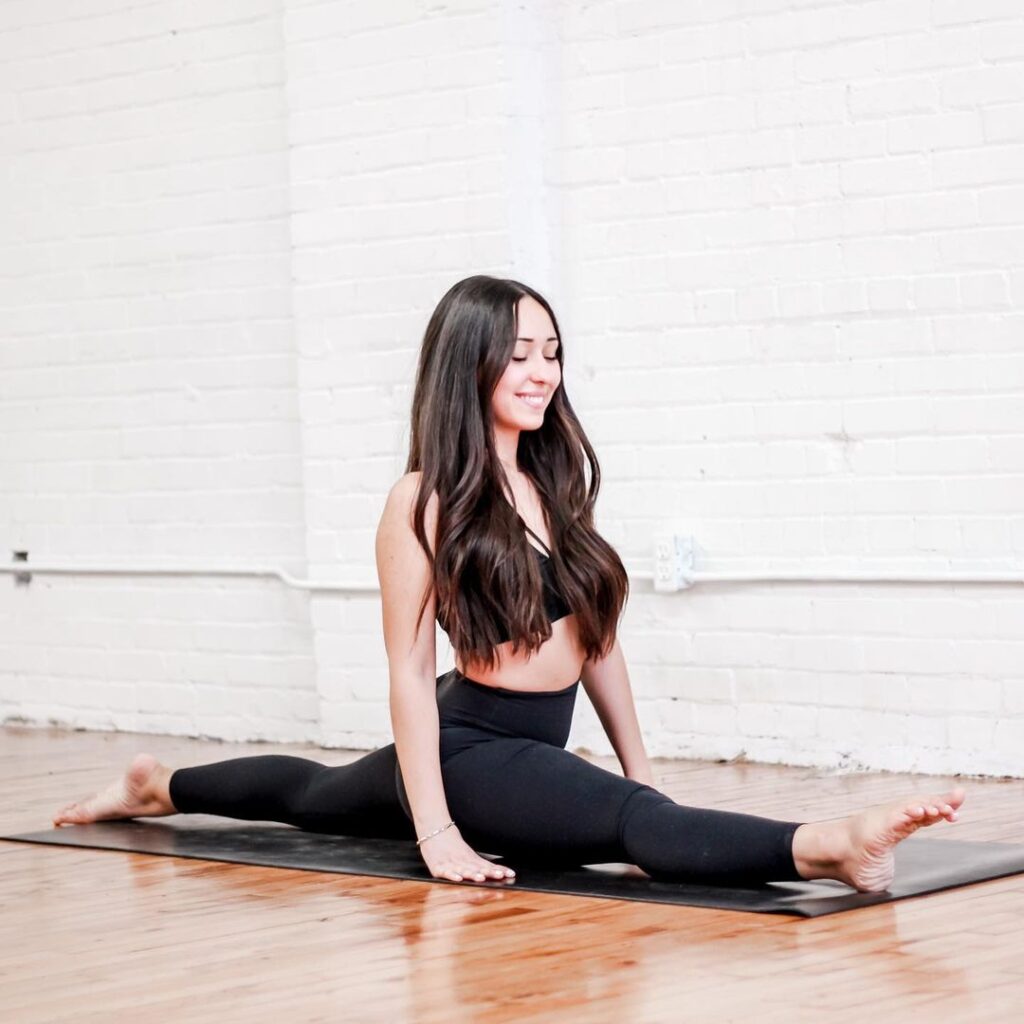
1. Gentle Variation
Step-1
Start in a lunge position with the right foot facing forward. Place the right heel directly under the knee, aligning the inner edge of the right foot so that it is pointing straight ahead, and making sure the right shin is vertical.
Step-2
Place the hands on the floor with the legs extended, fingers pointing forward. Stay on the ball of each hand if you wish.
Step-3
- Press the arms down to lengthen the arms, lifting the torso up so that you don’t drop into the shoulders. Gaze at the floor and breathe smoothly. Establish awareness in the rhythm of breathing.
- However, before proceeding further, keep the following two actions in mind while performing the asana:
- First, keep pressing down into the hands and lifting up, lengthening the arms for the duration of the pose. Rise above the shoulders as much as possible. It has been an important action in many poses.
- Second, stretch out the knees as you press the hips delicately toward the floor. Knees should be moved away from each other, right knee forward, left knee back. As this happens, there will be more room for the hips to sink down. The idea here is to make a straight line from knee to knee through the thighs.
- Maintain both of these actions for the duration of the pose, emphasizing an upward lifting action with each inhale and a hips-sinking-down action with each inhalation.
- As you exhale, slowly lower the hips down towards the floor. The hips probably won’t sink very far at first; Half an inch is a long way. Yet the intensity of the stretch can increase dramatically. Let the body weight do its work.
- Release instead of pressing into it. Stay where you are now as you inhale, extending the arms and lifting the chest, then exhale as you exhale.
- Keep pulling the knees away from each other. If this stretch is easy for you, cheer up.
Step-4
Wait for the musculature to get inside you, be gentle and delicate, not aggressive. Don’t create such intensity that you have to oppose it. Be stress free, be stress free. Indulge yourself deeply into the stretch. Apply pressure as needed, increase the intensity of the stretch when your body asks for it, still wait, and be patient. When the body is ready, let the asana deepen. Stay here at least 30 seconds.
Step-5
Lower the left toes, then straighten the left leg. It can be quite loud at first. The trick is to keep the current strong and steady in the back leg so that it feels comfortable. Keep sinking down with hips. Keep your shoulders raised. Gaze towards the floor. Stay here 30 seconds.
Step-6
Bend the left knee on the floor again and point the left toes. The chest has probably just been pressed into the thigh. Keep chest and thigh together as much as possible.
Step-7
Slowly and delicately move the hips back and straighten the right leg. Lift right toes off floor, roll onto center behind right heel, and keep chest firmly pressed into thigh as you slowly straighten leg. Bend the elbows toward the floor or straighten the arms and slide the hands away from you. The left thigh will now be vertical.
Step-8
Confirm chest-thigh contact by pressing the chest firmly into the thigh again, even if you have to bend the leg slightly; Then, keeping the chest and thigh together, try to straighten the leg further. You should let them fall apart during the last few seconds or breaths of this step, if at all. When you are able to fully straighten the leg without losing the intimate chest-thigh connection, you will have a very tight forward fold.
Step-9
- This is a strong stretch for most people, don’t push too deeply into the pose, and don’t be aggressive with yourself. Apply pressure, then wait for the musculature to release. Make the edge of the stretch darker than the edge. Move slowly, carefully, sensitively and stay in the comfort zone.
- Breathe smoothly and stay here for 30-60 seconds. Then slide the hands back, straighten the arms and lift the body away from the leg.
Step-10
Slide into splits, using hands for support, slide right heel away from you. move a little, then stop; To slide, stop, slide, stop. No hurries, take time, go slow. Wait for the stretch sensations to subside on each new edge before sliding deeper. Again, stay in the comfort zone. Finally, the hips will be on the floor; Not on the first day, perhaps, but at the end. Be patient and keep going slowly.
Step-11
Keep the right leg completely straight as you slide into the pose, using arm strength to prevent yourself from sliding too fast. Hover lightly at the sides, allowing the weight of the body to push you deeper into the pose. Pull the abdominals in and continue to lift the chest so that the spine sharply rises as the hips come down.
Step-12
When you’re done, rest in Child’s Pose. Then repeat this process with the other leg.
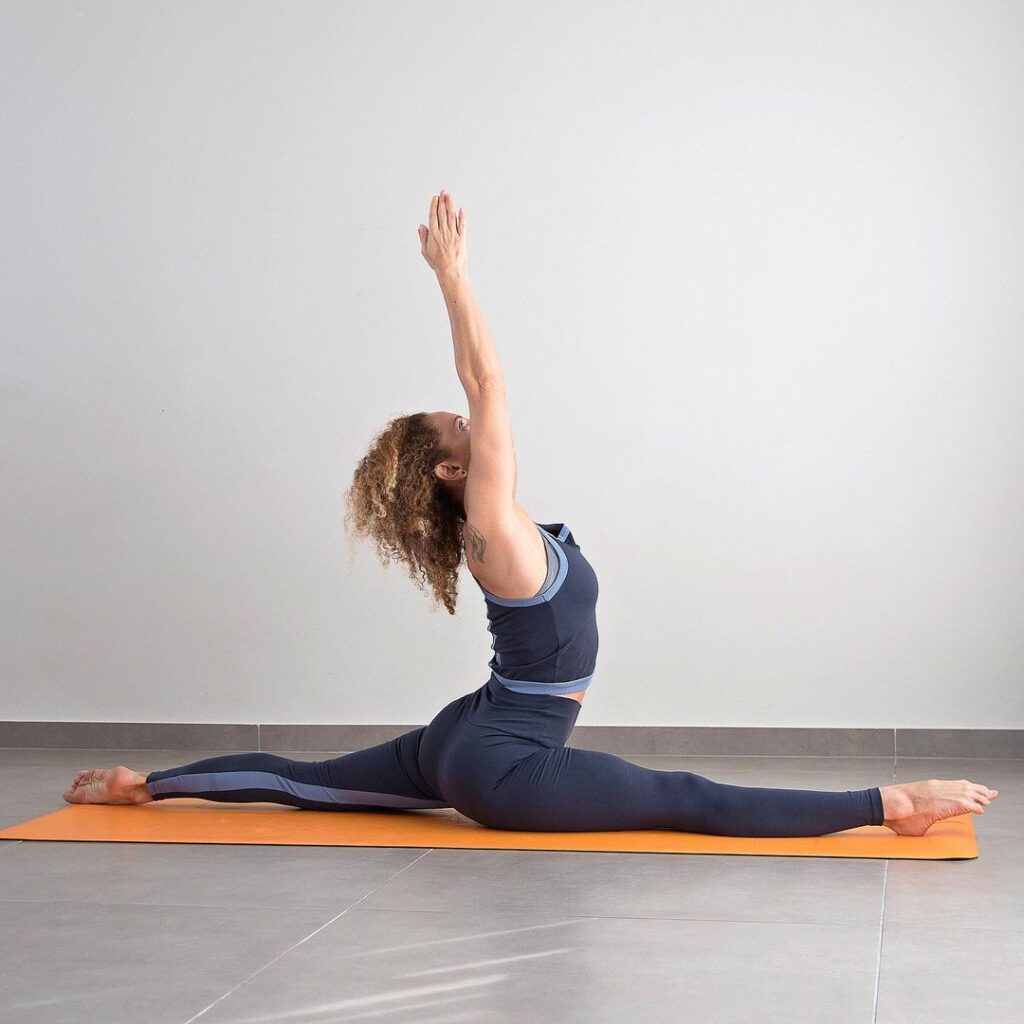
2. Hanumanasana or Front Splits Pose
Instructions
- Follow the Step-1 to Step-10 of gentle variation.
- After Step-10, inhale and pull through the legs again towards the pelvis.
- Exhale, lowering your tailbone again and extending out from your pelvis through the leg bones as you bring your hips to the floor.
- Extend fully through your legs.
- Raise your arms above your head, stretch up, put the palms together or open your fingers excitedly.
- It’s gives an extra stretch to your legs, and relieves strain on your back.
- Maintain a strong inner spiral in your back leg by extending the toes of your back foot.
- Your body weight should be in front of your right thigh.
- Press both thighs firmly to the floor to gain more lift in your torso.
- Stay in this position for 30-60 seconds, then release the pose. When done rest in Child’s Pose and repeat the process on the other side.
Step-by-step Anatomy Engaging Techniques
Step-1
Activate your gluteus maximus, hamstrings and adductor magnus muscles of your back hip to extend it. Engage your erector spinae and quadratus lumborum to lift your spine. Notice your paired movement of the hip, sacroiliac, and lumbosacral joints and how they contribute to elongation of your spine.
Step-2
- Your back leg rolls outwards in Hanumanasana due to the external rotation component of your gluteus maximus. Counteract this by contracting your gluteus medius and tensor fascia lata. The cue for this is to press the top of your foot into the mat and try to pull it out to the side. Your foot will not actually move, but engaging these muscles will internally rotate your hip and leg.
- Activate your quadriceps to straighten your back knee. One of your quadriceps, your rectus femoris, crosses your hip and tilts your pelvis forward (anteversion). This action is in synergizes with the psoas on your other hip, which wraps around the front of your pelvis and also tilts it forward.
- Anteverting your pelvis removes the anterior iliofemoral ligament (also called the “anti-Hanuman ligament” because it can block extension of your back leg).
- Sometimes a strong contraction of your back-leg quadriceps is all that is needed to achieve the last inch of full posture.
- Point your back foot into plantar flexion by engaging your gastrocnemius and soleus muscles.
Step-3
- Use your front-leg psoas to flex your hips and tilt the pelvis forward. To isolate this muscle, try to lift your entire front leg off the ground.
- Your leg will not lift but your pelvis will tilt forward and your hip will flex deepen. Remember that your psoas major originates from your lumbar spine. Engagement of this muscle not only flexes your hip and tilts your pelvis forward but also stabilizes your spine.
- Contract your quadriceps to straighten your front knee. This initiates reciprocal inhibition of your hamstrings, allowing them to relax into the stretch.
- Similarly, engaging your psoas results in reciprocal inhibition of your front-leg gluteus maximus.
- Your sartorius and rectus femoris muscles coordinate your psoas to flex your hip and tilt your pelvis forward.
Step-4
- Your front-leg gluteus maximus stretches in this pose and tends to pulls on your femur, rotating it outward. To counteract this outward rotation, activate your tensor fascia lata and bring the kneecap straight up. A cue for this is to press your heel of your front-leg into the mat and try to pull it out to the side.
- Your heel does not move because it is constrained to the mat, but the action engages your internal rotation component of your tensor fascia lata, turning your thigh inward.
Step-5
- Raise your arms by engaging your anterior deltoids.
- Externally rotate your shoulders by contracting your infraspinatus and short muscles, and engage your triceps to extend your elbows.
- Note that the long head of your triceps is attached to your scapula.
- You can activate this muscle to rotate your scapula outward. This pulls the acromion process away from your humerus, causing the arm to move up and further back.
- Feel this action by trying to lift your arms straight in front of you without contracting your triceps strongly. You will notice that your shoulders meet a point of resistance that prevents forward movement.
- Then firmly engage your triceps and notice how you can gain an extra inch or so of backward movement as you raise your arms.
Step-6
Contract your gastrocnemius/soleus complex to flex your front ankle. Engage your peroneus longus and brevis muscles to raise your ankle. Create an inverse counterforce to this action by activating your tibialis posterior. Notice how this stabilizes your ankle and dynamizes the arch of your foot.
Precautions and contraindications
Being a challenging practice, the Monkey Pose comes with some precautions to keep in mind to avoid hips, hips and legs in the muscles. These precautions and contraindications are explained below:
- Tailbone (Coccygeal), hips, listeners, knees, a person who is recovering from joints of ankles should avoid this yoga currency practice.
- Pregnant women should avoid this yoga pose, because it puts pressure to groin, pelvic, and stomach. This groin can also take varicose veins in the leg.
- After a run, Hanumanasana should not be practiced, or the event of a game in which foot muscles should be included. To avoid overstretching of leg muscles, care should be taken by the runner and therefore the splits Pose is not a great way to relax the leg muscles as part of cooling down.


